In my previous post about shopping my Creature, I spoke of the playfield as being an eyesore. With bare wood showing in places, and the clear coat worn and dull, I really wanted to restore it to its former glory. The fact is, I'm a little terrified to paint and clearcoat a playfield, and my preference is to install a new one. Years before I had passed on the "nude" Creature playfield sold by Illinois Pinball, which depicted Julia Adams naked, because I wanted this to be a family-friendly pin, and something of which I could show photos to co-workers without getting fired.
After performing my first playfield swap on White Water, I wanted to take the same approach with Creature while applying what I learned from that first go-around. When I saw that Mirco was making Creature playfields, I jumped at the chance to get one, since the White Water playfield from Mirco was beautiful. So I pulled the trigger and ordered one. While I continued finishing up White Water, the new Creature playfield was stored out of the way up in the attic, where temperatures can get pretty warm over the summer. It was a few months later when it was revealed that JJP and Stern playfields had pooling and chipping. The JJP playfields were manufactured by Mirco, while the Stern playfields were said to be made by someone else. It's likely there was kind of defective material that impacted multiple playfield manufacturers, and while my White Water was fine, it was manufactured a couple years before these incidents. I feared the worst for my new Creature playfield, which was produced during this period of questionable quality. You'll see what I encountered in the captioned photos below.
To start the playfield swap, I needed to remove everything off the old playfield. Here are a few steps that I take because I'm a bit OCD, and on White Water I would occasionally get stuck when I didn't have a reference or have something labeled.
- I take photos - over 60 for Creature, in fact. I use them as a reference when I put things back together. I mentally divide the playfield (top side and under side) into sections, then take photos of each section from multiple angles.
- I use Ziploc bags to store hardware and label each bag, such as "ramps" or "slings".
- Using a pen and paper, I write down everything I remove from the under side of the playfield, in the order I remove it, referencing location if necessary. Some people have great memories or can intuitively figure things out and don't need to do this. I'm not one of those people. It can be tedious, but doing this has saved my butt many times over.
This wiki guide was extremely helpful in doing the top side tear down. When doing a playfield swap, however, it doesn't help with the under side (hence bullet point #3 above).
Below are several photos I took along the way, with captions to explain context. I realized when I did the first "Shopping the Creature" post, I left out some preexisting condition photos, especially of the under side, so I'll lead with that...
 |
The under side was absolutely filthy. Blue painter's tape...why?! I have no idea.
|
 |
Check out the burn mark in the right inlane and the horribly bent sling leaf switches.
|
 |
Here's the game with the apron off...nasty. This is a Thomas A Grant (TAG) playfield. Fun fact: TAG was purchased many years ago by Gene Cunningham (of Big Bang Bar remake fame).
|
 |
The subway is pretty gross.
|
 |
Look at the rust on the standoff posts...WTF?
|
 |
A board in mid-clean prior to LED installation. Pretty grimy.
|
 |
After removing and cleaning boards and installing LEDs, they go on to the new playfield.
|
 |
One last photo of the old playfield with (almost) everything removed.
|
 |
Everything magically appeared on the new playfield! Okay, I lied...this was actually a lot of work, including frequently referring to my notes and photos to get everything put back correctly. You can see that the subway cleaned up quite nicely.
|
 |
Here you can see LEDs, metal guides and standoffs have been installed. The LEDs in the bumpers were sticking up too far, causing the caps to sit cock-eyed. I needed a different solution.
|
 |
I ordered these Pop Bumper Discs from Comet Pinball. They sit flat and have a low profile.
|
 |
I made my own custom rubber ring kit through Titan, color matching to playfield. There was a problem with the order but Titan quickly fixed it, great customer service!
|
 |
Plastic posts from Marco, again color matched to the playfield.
|
 |
The bumpers with the new discs installed...much better! Also posts are getting installed too.
|
 |
My worst fears realized...the Mirco playfield clearcoat looks way too soft, star posts are sinking into it.
|
 |
Bottom half of the playfields. New playfield on the left, old playfield on the right. Colors are much more vibrant on the new playfield, except greens and yellows seem a bit subdued.
|
 |
| Same comment as the previous photo except this is the top half of the playfields. |
 |
My solution to the soft clear - place a teflon washer under each star post. I picked up the washers at a hardware store. Only time will tell if this works or just pushes the issue farther out into the playfield.
|
 |
The first All Lamp Test, looks pretty good, only two lights out that needed a solder reflow. This is recommended before installing ramps...you don't want to pull them again.
|
 |
The new Creature window is installed, and MikeD mod re-installed.
|
 |
Old plastic on the left, new plastic on the right. Not only are colors on the new plastic more vibrant, check out how the clear section has yellowed above the diver on the old plastic.
|
 |
Same as above...notice the yellowed area on the right side of the old plastic.
|
 |
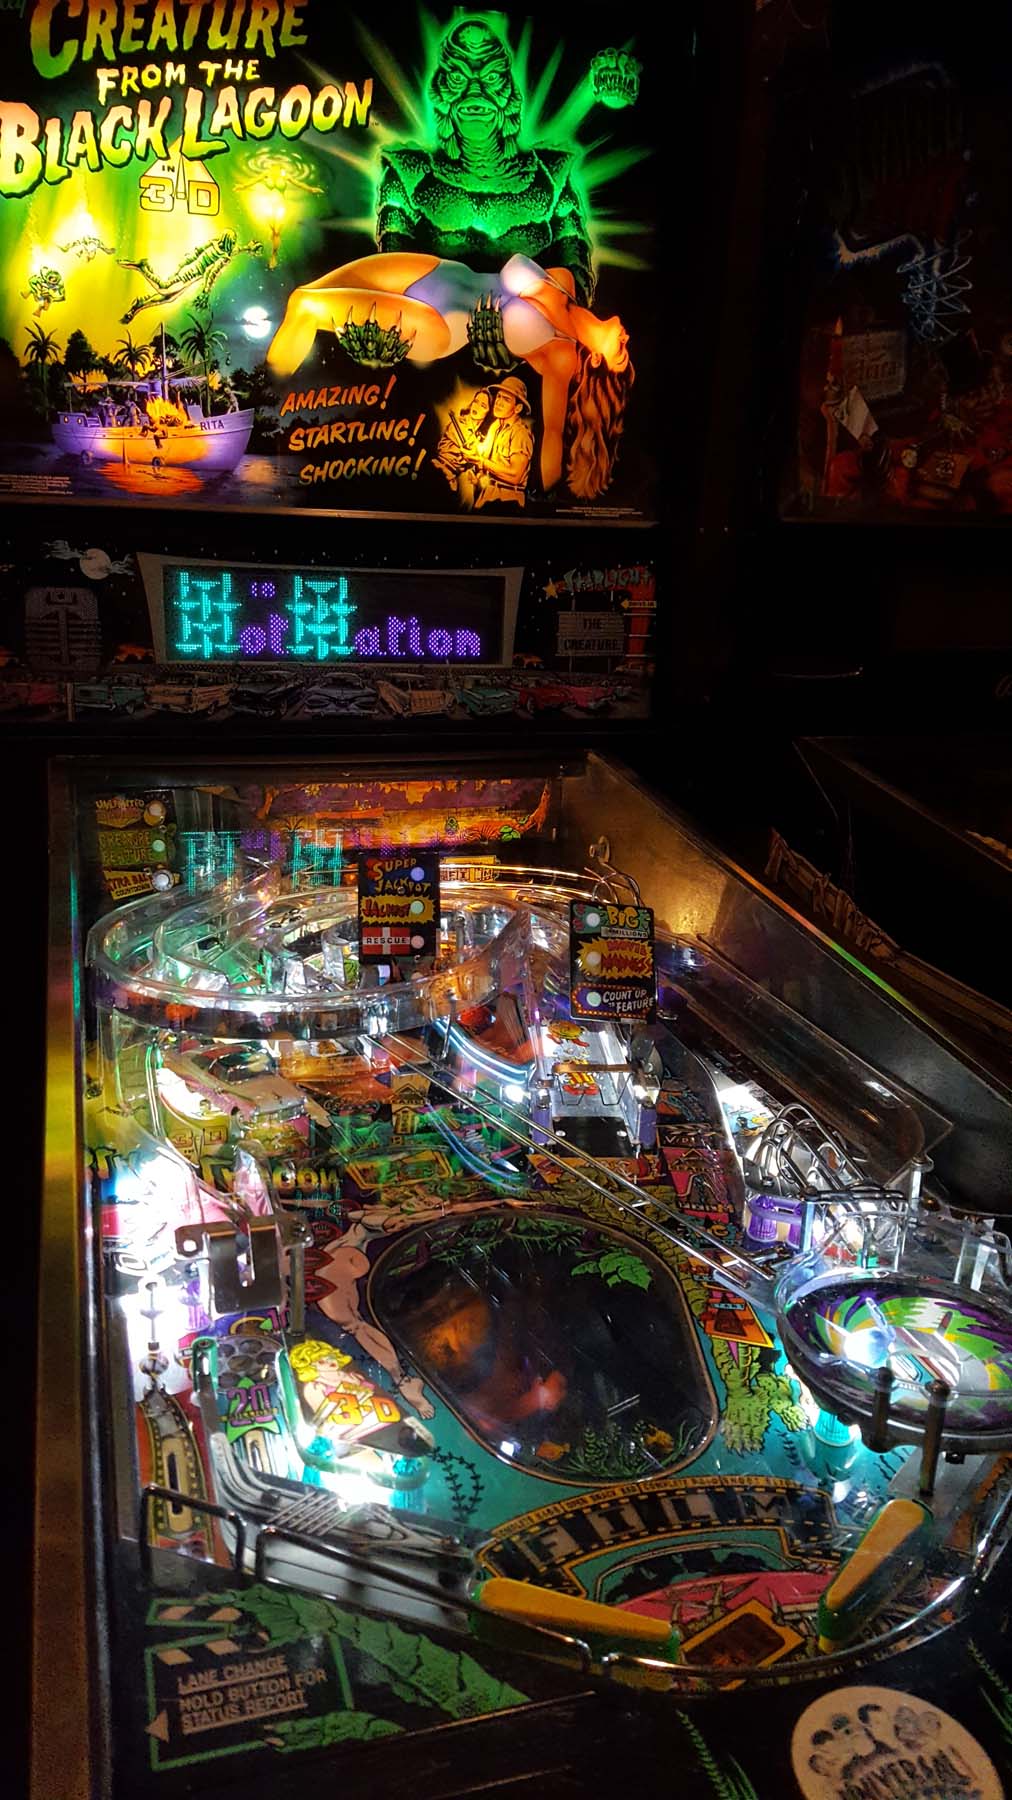
The completed swap, ramps have been installed along with some of the mods.
|
Summary of work done:- Cleaned all ramps with Novus 2.
- Cleaned all metal parts with Never Dull and Simple Green. For my next playfield swap (Scared Stiff or Rocky and Bullwinkle) I'll put a lot more effort into polishing and buffing metal pieces.
- Cleaned all circuit boards.
- Replaced all coils and coil hardware.
- Wiped down wire harnesses.
- Repaired cut or burnt wiring.
- Reflowed any questionable solder joints.
- Replaced all incandescent bulbs with LEDs.
- Waxed new playfield.
- Replaced all rubbers with Titans, including under the Creature window. Color matched to playfield.
- Replaced all plastic posts, color matched to playfield. Installed teflon washers under each post.
- Replaced sling hardware and leaf switches.
- Installed new flippers and flipper kits.
- Repaired lift assembly (broken wire).
- Wired bumpers for lights and installed Comet bumper lights.
- Replaced all playfield plastics, including melted Big Millions sign.
- Repainted wood black shooter lane guides.
- Installed Cliffy hole protectors.
- Installed new Creature window and applied new decals.
- Installed Swinks snackbar mod.
- Installed Color DMD.
- Installed pink Crown Victoria with lighted headlights.
- Installed magnetic reed switch on creature bowl.
In my next post I'll talk about some of the mods in the game and those that have yet to be installed...


Comments
Post a Comment